 For selective focus shots the lensbaby has taken a firm hold in the industry. This lens with its flexible tube allows the photographer to have one section of their image in sharp focus whilst all the rest has a soft blur. All those minimal depth of field shots in food, lifestyle, travel or health magazines in recent years more than likely were created using a Lensbaby. Which is great if you have a camera which allows you change lens, but if you have a fixed lens camera this effect is just a pipe dream.
Well not anymore.
Here is a recipe to create the very same effect using your digital editing software with results that equal or may even surpass those made with the Lensbaby.
The image at the start of this post was made using this recipe.
Being a Photoshop junkie I will use their work flows although I am sure other editing software can achieve the same results.
Step 1
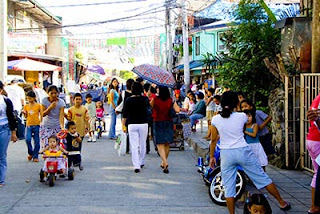 Upload your image and do your usual post production editing to tweak it to your look. My preference is to shoot in RAW and upload at 300dpi, I like lots of pixels to play with. This recipe will work with other resolutions but, as always, the more pixels you have the smoother the end result.
Step 2
 Select your focal point. Using the Radial Blur Filter, in PS that is Filter>Blur>Radial Blur. Select the zoom option in draft mode at about amount 18. The result will be pretty ugly but it makes it quicker and easier to see exactly where your focal point will be. Position your cursor on the central dot in the 'blur center' screen, left click your mouse and then position that dot over the part of the image you want to be the focal point. Apply to the image and see how close you are. This will take a few attempts which will require you to step back through your history for each attempt.
Step 3
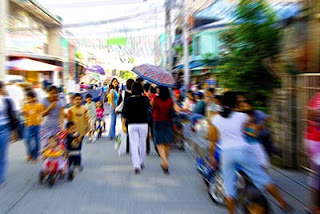 Once you have found your focal point step back again in your history select the Radial Blur Filter and change the mode to Best and adjust the amount down to what looks good to you whilst staying in zoom. I find that a range of 7 to 12 works for me most of the time. Apply this to your image.
Step 4
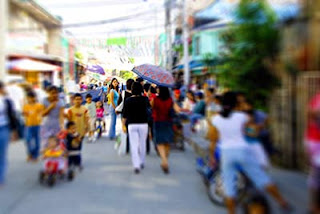 Without stepping back in history this time, open the Radial Blur tool again and select spin at an amount of 2 or 3 and apply it to the image. You're almost done.
Now sharpen the image, I like to use USM at around 100 for this. I also add a touch of noise to smooth out any jaggies that may appear, in PS that is Noise>Median set at 1 to 3 pixels.
Crop (if necessary) and you are done.
Please note that different amount settings in steps 3 and 4 will produce different results with higher settings producing a more dramatic effect, so play until you have the look you want.
Not too difficult and you have the Lensbaby look for your photograph without the use of the actual lens or the need to buy that expensive DSLR body..

3 comments:
Probably more fun to take the photography with the Lensbaby.
Very difficult with a fixed lens camera.
Auto Blur background Photo Editor & Blur image Background Effect on image app gives a stylish DSLR blurry effect on images with easy to finger pressing editing work. Also, use Blur background Photo Editor & blurry image app like an expensive DSLR camera blurry photo tool.
Post a Comment